WallPlan
Introduction
A tool to schedule, organize events and coordinate activities with others. Accessible from any device with a modern browser and an active connection to the Internet.
To make use of the tool an organisation and membership accounts need to be created. One or more WallPlans registered to the organisation account. Each WallPlan having a membership drawn from the organisation members. WallPlan my have different membership Lists.
In addition to Members timelines, custom timelines can be registered onto a WallPlan, can be for any purpose. Any member can post an event onto a timeline but only OrgAdmins can create or remove a timeline.
There are 2 types of member accounts OrgAdmin and User. OrgAdmin can create Member accounts, Add \ remove WallPlans, modify WallPlan Membership, A User can view WallPlans they are a member of and Add \ modify Events they register.
Get Started
To get up and running on WallPlan you need to register your Organisation and an Administrator. The administrator being responsible for adding, suspending accounts, creating WallPlans Timelines on a WallPlan and membership of the WallPlans.

On the Landing page shown Press Register Organisation.
This will bring up the Register Organisation Screen shown below. Enter details requested by the form and press Submit

Using the details entered, the app will create a Organisation, System administrator accounts and a default WallPlan. Note the organisation name and the Administrator login must be unique. A confirmation screen will show your entry's have been accepted else errors will be displayed.
To enter, go through the logon process and if accepted the default wallplan will be shown.
Login
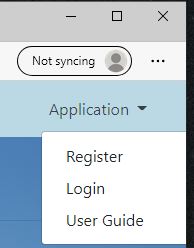
Click on "Login" or alternatively click on Application in the menu bar then login in the dropdown menu. This will bring up the login screen
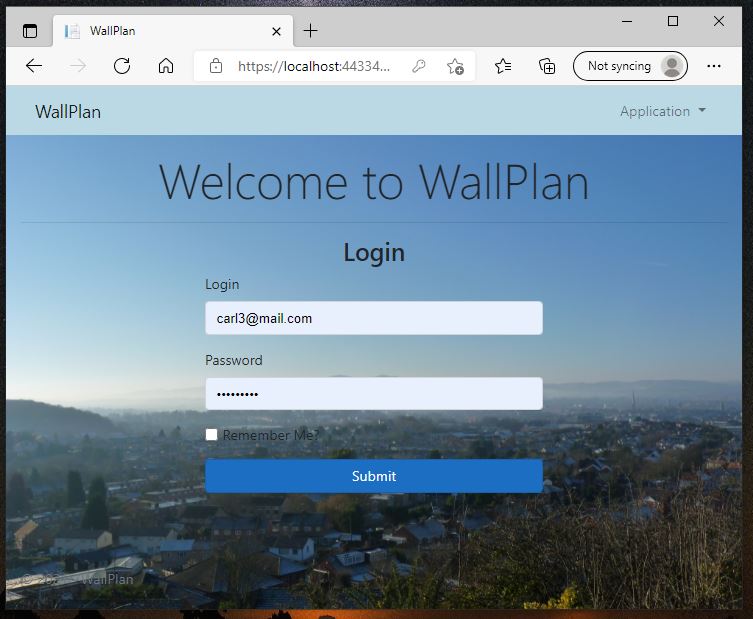
Enter your credentials and press submit. The app will examine your credentials and if good will let you into the application and display a wallplan. If not will return errors at you.
WallPlan
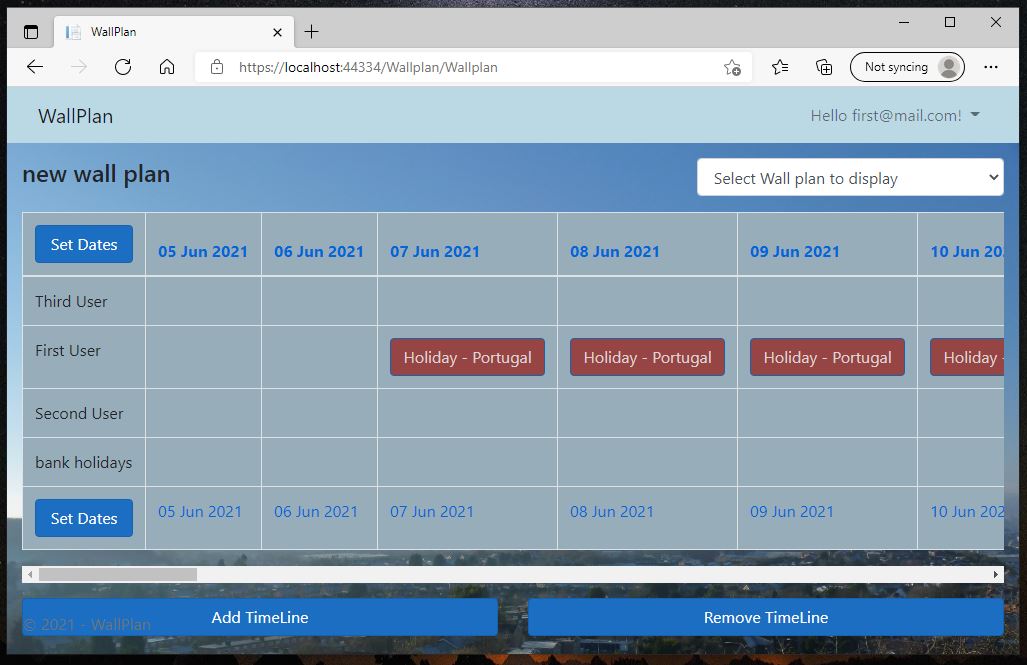
A successful login goes to the WallPlan screen. Will be the last WallPlan shown. The WallPlan screen has a top middle and bottom. On the top LHS is the WallPlan Title on the RHS is the WallPlan selector. Used to choose which WallPlan to display. Note only WallPlans the account is a member of will be displayed in the list.
In the middle is the wallPlan , A horizontal or vertical grid bounded on one axis by dates and the other by members and Timelines. Each corner contains a set dates button where the WallPlan configuration can be set ie the date range the wallPlan covers and orientation, horizontal or vertical.
On the bottom are the Add and Remove timeline buttons. Only shown if the account has OrgAdmin privileges. Any member of the WallPlan can add events to a timeline but only they can edit or remove that event.
Add Event
To add an event click on a date that will bring up the event form. Enter the event details then close the form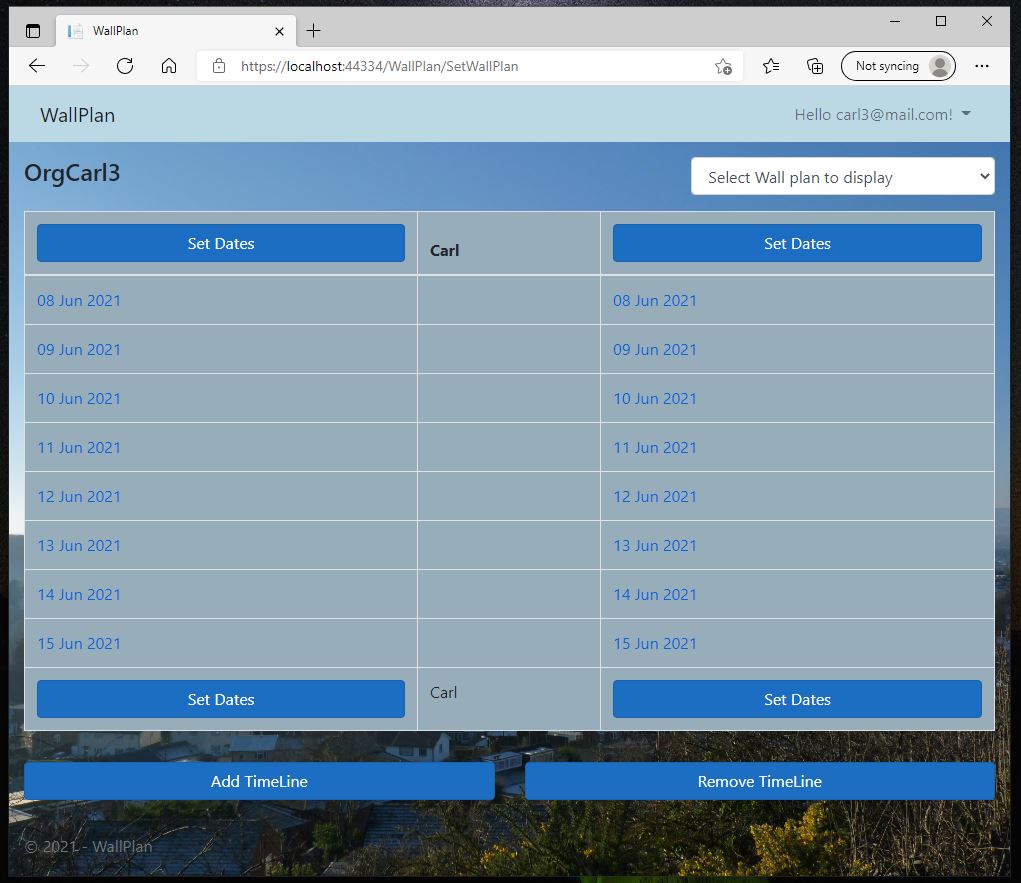
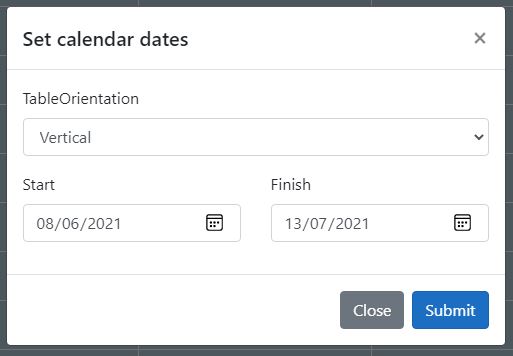
Set WallPlan date range and orientation.
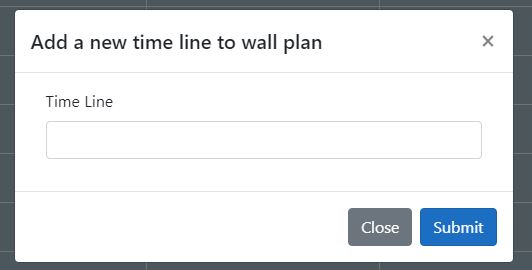
to add a new Time line click on "Add TimeLine" button enter its name And press submit. Note only members with administrator privileges will be able to do this. All members of the WallPlan will be able to place events onto the time line
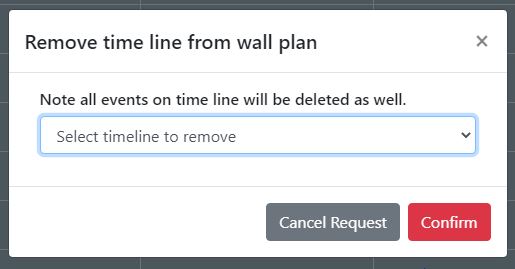
To remove a TimeLine click on "Remove TimeLine" select timeline from the drop down list and press confirm. Note only members with administrator privileges will be able to do this.
WallPlan Events
Adding updating and removing an event
To add an event on the WallPlan click on a date. the event details screen will pop up for you to enter the event details.

Fill out the form details and press Submit to post the event onto the wallPlan. The event will appear on your time line unless you have selected a time line.
To edit or delete an event click on it. The event form will appear. Press delete to remove the event or modify the details shown and press submit to update it.
To view an event posted by someone else click on it, The event form will appear but you will not be able to make any changes to it. Only the author of an event may may changes to it.
Manage members
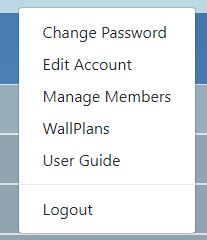
On the drop down menu select Manage Members
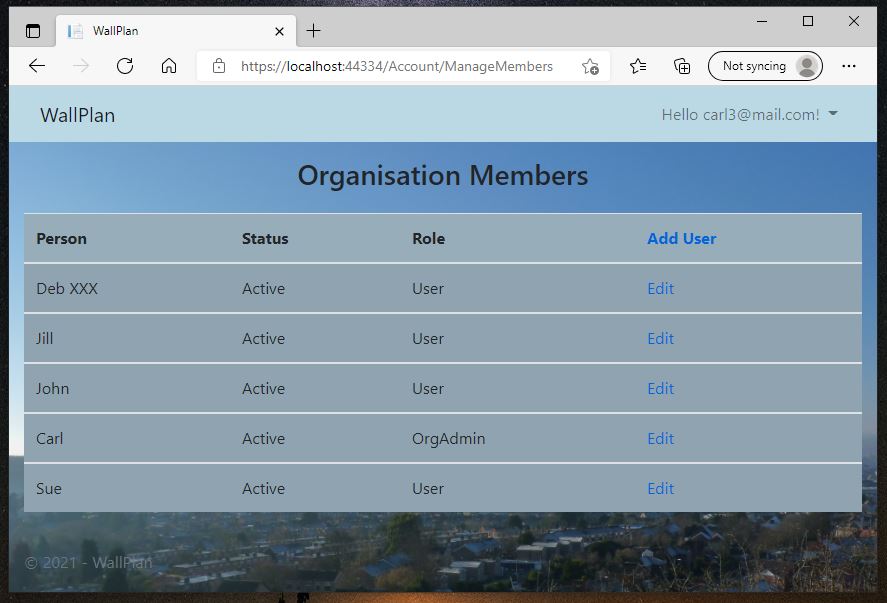
A list of current members,their status and Role will be shown. To Add a member Press "Add User" to edit a user Press Edit.

To add a new member.
Enter the persons details on to the form. Select the WallPlan the person will be a member of. Note you will be able to add more. Pick the Role "User" or "OrgAdmin" you want the person to have. This can be changed later. Press submit And if all is OK the person will appear on the organisation members list.
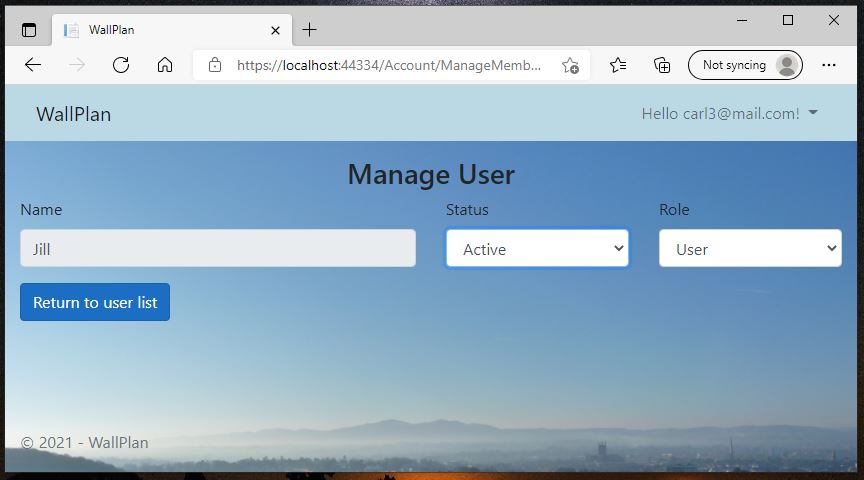
When editing a member you can set the members Status or Application Role.
Status is either Active or Suspended
Active : the persons account is live
Suspended: the account has been deactivated ie the person can no longer login to the application.
Role is either User or OrgAdmin
User : the account can add or view Events on WallPlans
OrgAdmin: the account can add members and set which wallplan a member can view. Also suspend an Account.
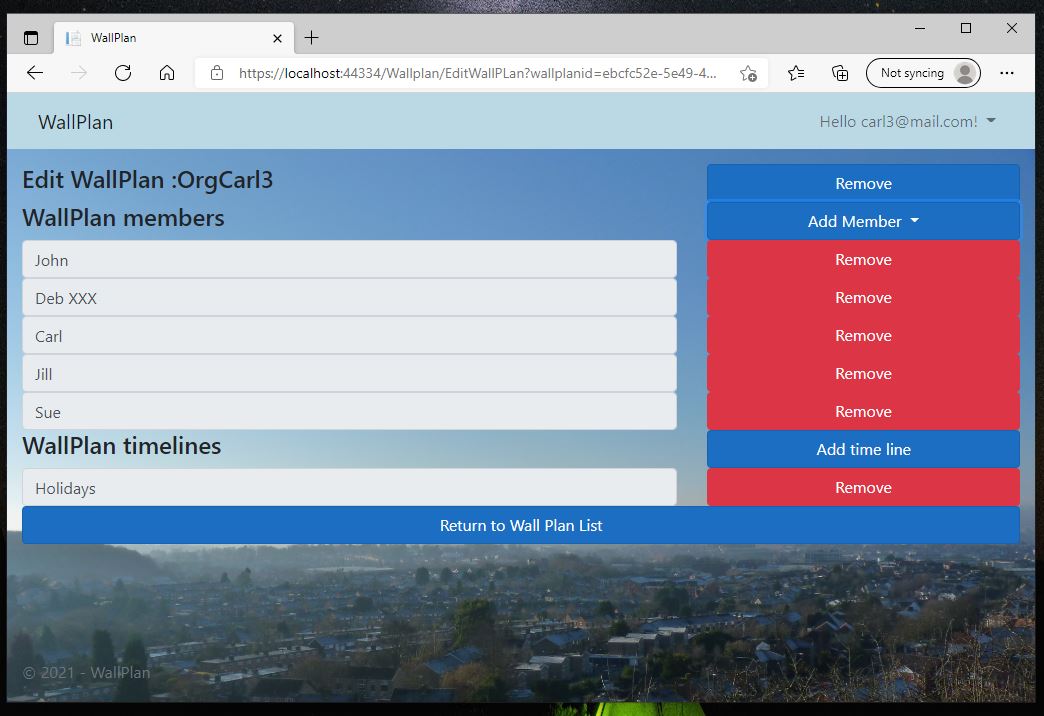
Manage WallPlans
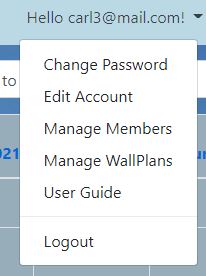
On the drop down menu select Manage WallPlans. this will bring up the screen showing the all the wall plans in the Organisation.
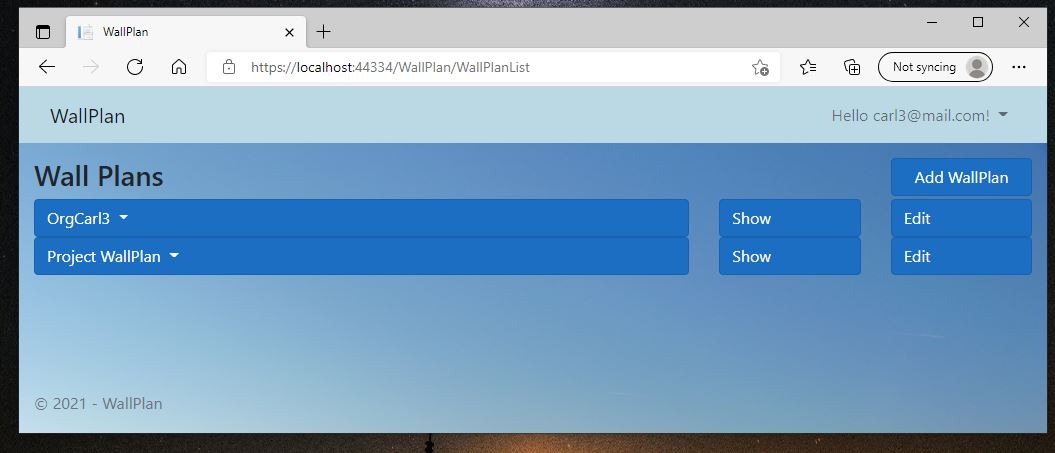
A List of the WallPlans in the Organisation is shown. Click on a WallPlan to view the membership of that wallplan. Show to View the WallPlan And Edit to modify the wallPlan.
Show to View the WallPlan , take you back to the main wallPlan.
Edit to modify the wallPlan. i.e. change the membership or add\remove a timeline.
Remove WallPlan
Remove the WallPlan from the organisation and deletes all data belonging to that WallPlan. Is not recoverable.
Add Member
Add a person to the WallPlan, Pick from list of Organisation members displayed.
Remove Member
Remove a person from a WallPlan, will erase all the data ie events that person has placed on the WallPlan. Once deleted cannot be recovered.
Add Time Line
Presents a dialog, in which to Add the New Time Line name to Add.